Certificate Assistant - Create Self-Signed Certificate
How to create a self-signed root certificate using Certificate Assistant on Mac computer?
✍: FYIcenter.com
 If you want to create a self-signed root certificate on your Mac computer,
you can use the Certificate Assistant inside Keychain Access
as shown in this tutorial.
If you want to create a self-signed root certificate on your Mac computer,
you can use the Certificate Assistant inside Keychain Access
as shown in this tutorial.
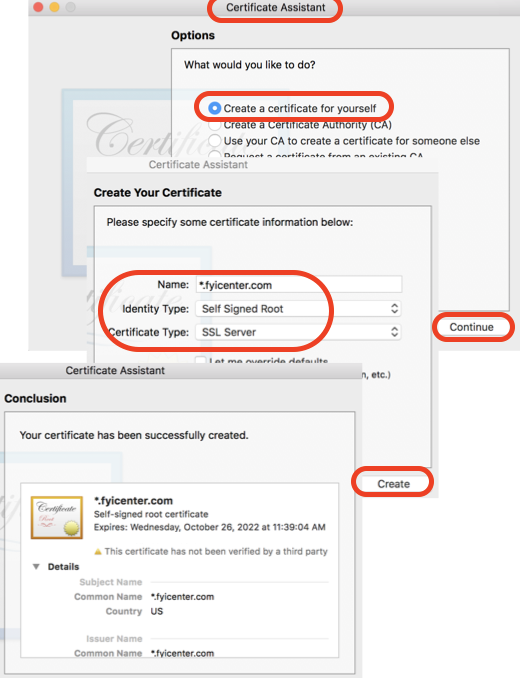
1. Start Certificate Assistant inside Keychain Access as shown in the previous tutorial.
2. Select "Create a Certificate for yourself" option and click "Continue". You see the "Create Your Certificate" window.
3. Enter or select:
Name: *.fyicenter.com
Identity Type: Self Signed Root
Certificate Type: SSL Server
4. Click "Create". You see a warning message box.
You are about to create a self-signed certificate.

A self-signed certificate does not provide the security
guarantee of a certificate issued by a Certificate
Authority. Before your self-signed certificate is
accepted, the recipient will be asked to confirm that
they wish to trust and accept it.
5. Click "Continue" on the message box. You see the "Conclusion" window with a summary of the newly generated certificate.
⇒ Certificate Assistant - New Certificate Location
⇐ What Is Certificate Assistant on Mac
2022-02-19, ∼2035🔥, 0💬
Related Topics:

